Hydrocamp 2010
Water Column manual
By
Hesham Elhegazy
12 Oct, 2010
Contents
1. Locate the
position of interest in
the line using the vertical profile (.vert_prof):
2. Open the (.merged)
line in
swathed:
3. How to use the
Water Column tool:
4. Create a 3D
movie for the vessel
“rotating” and “moving along”:
1. Locate the position of interest in the line using the vertical profile (.vert_prof):
After unraveling the data, go to the merged file
Use the following command to view the vertical profile of the line:
jview –seis
line name.vert_prof
This command will open the line in vertical
profile.
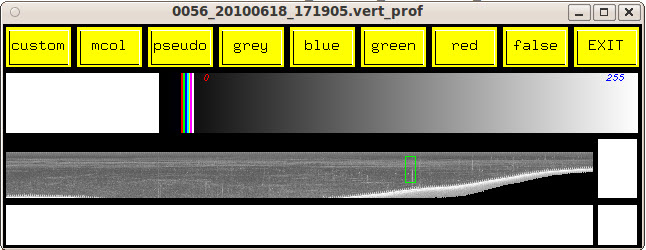
Figure 1 vertical profile
Position the mouse on the line. Click and drag a
square to
zoom in. Another window will open showing a zoomed section of the line.

Figure 2 Vertical
profile cross section
Use left and right arrows on the keyboard to move through the line and see all of it.
When you find the area of interest, click the
middle mouse
button, this will show x and y values for this point.
Write down the x value, exit.

Figure 3
The x value in the
vertical profile
2. Open the (.merged) line in swathed:
swathed line name.merged
Fig.4A: Find the location of x that you wrote down in the last step by using the space bar. The X value can be seen in the window (Fig.14C)

Figure 4 A) The time series B) swath side view C) heading, roll, pitch and heave window
Fig.4B: In the side view of the swath, position
the mouse on
it and move through the 80 pings-ping by ping- using the left and right
arrows
on the key board to find the exact X or sw value (Fig.5)
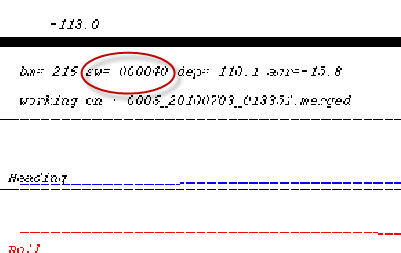
Figure 5 number of swath
3. How to use the Water Column tool:
Click the WC button
located on the top left side of the swathed window (Fig.6)
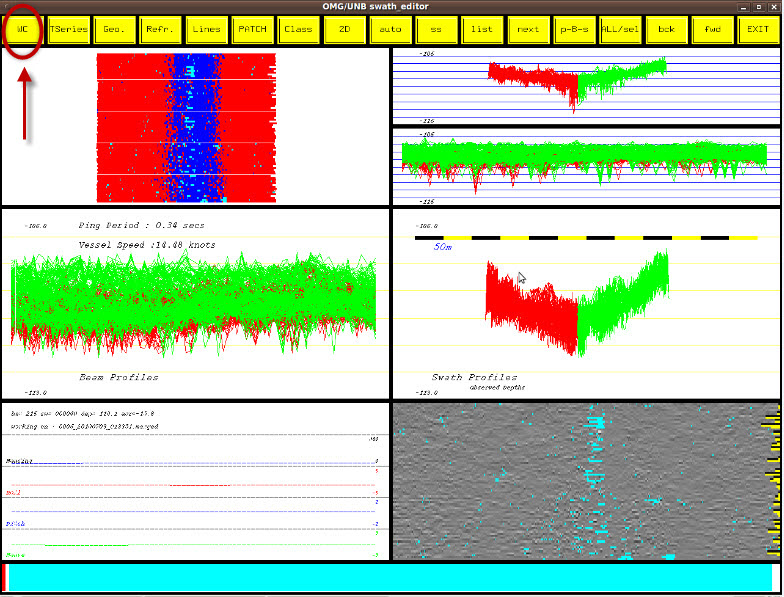
Figure 6 Water
column tool
Water column tool will process the pings till the
ping
number that you have chosen in swath window.
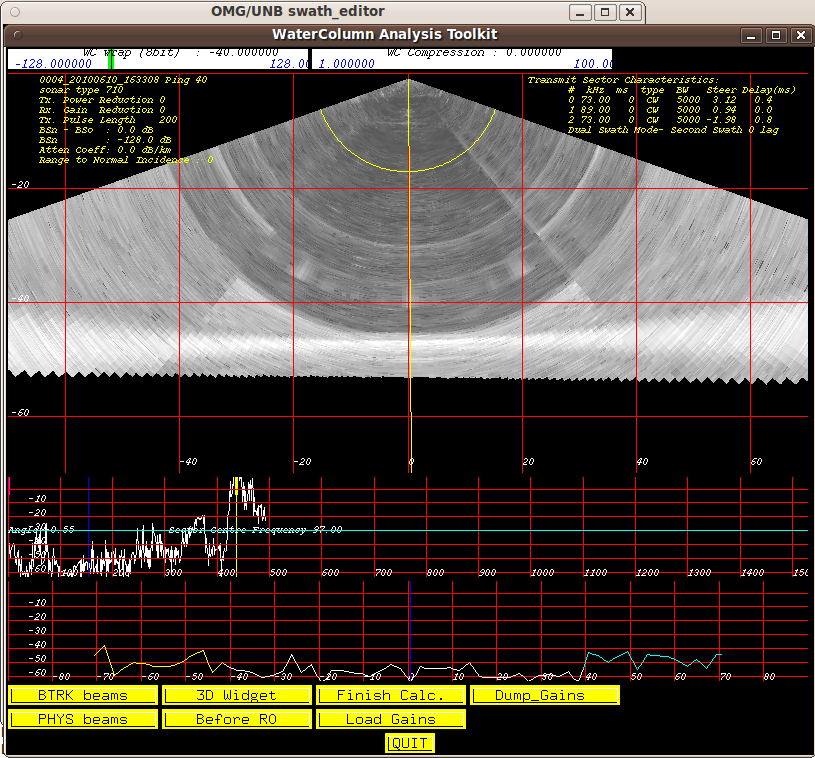
Figure 7 water column window
(Fig.8) The yellow
half circle and
line can be controlled using the left, right arrows and up, down arrow
respectively. When both meet in one point,
you can see the frequency of this point in the frequency section of the
water
column window.
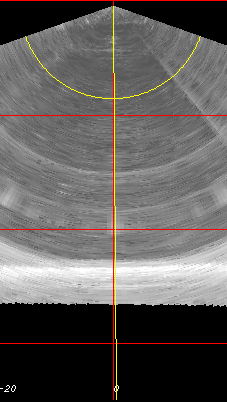
Figure 8
Buttons:
- BTRK beams: Tracks beams horizontally
- PHYS beams: Tracks the sea floor
- 3D Widget: Takes you to the 3D window
- Before RO: Suppress beyond RO
- Finish Calc.: Finishing processing water column
- Load_Gains: Loading sector gain
- Dump_gain: Dumping sector gain
- Quit: exit
4. Create a 3D movie for the vessel “rotating” and “moving along”:
Press the 3D Widget

Figure 9 3D widget button
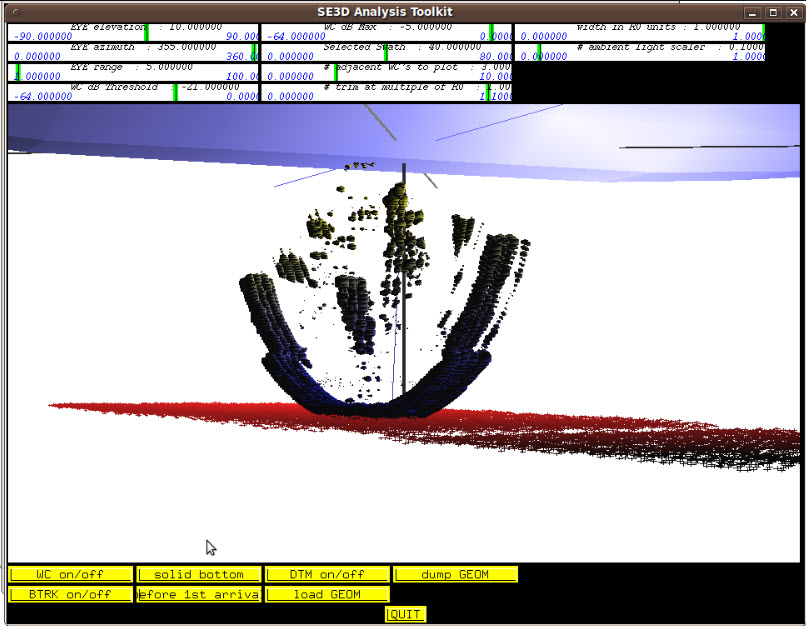
Figure 10:
3D widget view
Use the following options to adjust the vessel and the beams position, just by positioning the mouse on the function and use left and right arrow on the key board.
Functions:
- Eye elevation: Rotate all around the x axis
- Eye azimuth: Rotate all around the y axis
- Eye rang: Zoom in and out
- WC dB Threshold: Threshold the noise
- WC dB Max: maximize and minimize density of the beam
- Selected swath: select one swath
- # adjacent WC’s to plot: select number of swathes
- # trim at multiple of RO: Trim the multiples
- Width in RO units: controls width
- # ambient light scaler: Lighten and darken the image colour
Buttons:
- WC on/off: turn water column on or off
- BTRK on/off: Turn beam track on or off
- Solid Bottom: creates a solid buttom
- Quit: exit
Use the “r” key on the keyboard to create rotation images, and “w” to create the drive along images.
This will create ppm images in your file.
Exit water column tool
Create a new file for the ppm’s:
mkdir file name
Move all ppm’s inside this file:
mv *.ppm
Create an animated gif for “rotation”:
convert -loop 0
-delay 25 3dim_azi*.ppm name.gif
Create an animated gif for “drive along”:
convert -loop 0
-delay 25 3dim_scan*.ppm name.gif
Open the animated gif using web browser:
web browser
name file name.gif
Figure 11 Rotating
Figure 12 Drive along
Short cuts when using the water column tool:
- C: will switch the water column between the Fan view and Curtin view of the line
- Right arrow: moves to the next beam starboard side
- Left arrow: moves to the next beam port side
- 1,2,3 keys: to select first, second and third sectors of the multibeam respectively
- Pg up: after choosing the sector, use pg up to lighten the sector colour
- Pg down: after choosing the sector, use pg down to darken the sector colour